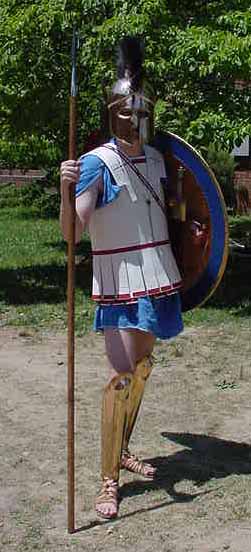
LINOTHORAX 10/23/04
![]() |
The linothorax, a cuirass made
of layers of linen glued together, was the dominant form of body armor
in the fifth century BC. Again, Peter Connolly has the most information
and the best reconstruction. Just how much solid information there
is on the materials and construction processes used, I really don't know!
I'm basically taking Connolly at his word. There is much speculation
about whether leather might have been used as well, but I think that without
some original reference to such details, we're left with just illustrations
and the name "linothorax". It is clear that in later periods, armor
in the same shape as the linothorax was made of lamellar or scales, or
quilted fabrics. Even the Roman mailshirt, lorica hamata, has the
same shoulder flaps as the linothorax, most likely just because it was
the fashion!
In his latest Osprey book, Nick Sekunda reconstructs the linothorax as being made of iron plates hinged together and covered with linen! This seems to be based on the iron cuirass of Philip II of Macedon, a mid- to late-4th century armor. But there is NO way that the shoulder flaps of such a cuirass would stand up in the air (as shown in numerous vase paintings) unless they were spring-loaded! Needless to say, I disagree strongly with his interpretation. Often the classical linothorax is shown reinforced with scales, but I opted for plain linen. I also kept the decoration very simple. On May 13-14, 2000, I wore
my linothorax (and the rest of my hoplite gear) for the first time, at
Jamestown Settlement, VA. I was there with my Twentieth Legion as
part of an armor time-line which was meant to complement a display of 17th
century armor from Virginia and Europe. We Romans decided to show
armor from a variety of periods, ranging from 500 BC (Yours Truly) to about
200 AD.
Below is Jon Martin's linothorax, which he made from natural linen, reinforced with bronze scales. |
RESEARCH AND DEVELOPMENT--I
started by making 2 glued linen test patches c. 3"x5", both 14 layers of
linen (not very heavy), and c. 5 mm thick. One was glued with Titebond
Hide glue, and the other with Elmers Carpenters glue. The hide
glue soaked through the outermost layers and the piece was hard and rigid.
The Elmers didn't soak through much at all and the piece had a little flex
to it. I put both pieces under my tunics against my belly while wearing
my Roman lorica and subarmalis for c. 4 hours in 90+ degrees heat.
Upon removal from this demanding environment, both pieces were quite flexible,
and soaked with sweat around the edges where there was no glue. One
layer of the hide glue patch fell right off, and others were loose, but
the Elmers patch held together and seemed fairly secure. Furthermore,
neither piece glued itself to my skin or underwear.
I had considered thinning the
glue with water to make it easier to brush on, but now I know that's unnecessary
and would just cause it to soak through the outer layers. Tom Kolb
is planning to investigate waterproof fabric glue, at least for the outer
layers, since he doesn't want to risk it melting down.
Asterix (Australia) made
his linothorax by gluing 25-30 layers of cotton. He seems to
let the glue set while the body is flat, then bends it and laces the edges
together while the glue cures completely. I wrapped the layers of
the body around a form to dry, rather than flat, so that it is easier to
put on. It might be wise to make the outer layers slightly wider
than the inner ones, and to leave extra margins. The shoulder flaps
should dry flat, though. I also think 25-30 layers is too much, but
that would depend on the thickness of the fabric. I used 16 layers
of linen, mostly a heavy natural Belgian linen, with two or three layers
of white on the outside. (M.J. Cahn company in New York sells
VERY cheap linen! See below!) About 15 yards of
linen (45" wide) is needed, plus about 4 yards more if you want two rows
of full-thickness pteruges.
Toe Johnson (Australia) recommends
making a sabersaw blade out of a steak knife to cut the glued linen, as
anything else will tear up the fabric. I found that a utility knife
with a nice fresh blade works fine on straight cuts, like the pteruges.
For the curves I used a coping saw, which works fine and is faster, though
it does leave a fuzzy edge on the inside which needs to be trimmed with
a knife or scissors. Cuts which came out a little wobbly with the
coping saw are easily trimmed with a knife. I also experimented with
metal snips for for trimming the edges, but make sure they are CLEAN before
you start cutting!
A couple years ago I made
a pair of glued linen Mycenean greaves, 4 layers of canvas and one of linen.
At that thickness they probably won't keep out many spear thrusts, but
they made a good experiment and are probably great for yardwork.
(They are not dished out for the kneecap, though, so they fit a little
strangely there.)
PATTERN--Always make a cardboard pattern! ("Papyrothorax", as it were.) The height is from about your throat or collarbone to the crotch (not longer), and the length is your greatest circumference, of course. The bottom is slit into pteruges about 2-1/4" wide by 8' high. Measure the rest of the body into 4 segments so that the back and front panels are twice as wide as the sides (i.e., 42" total length equals front and back each 14", sides each 7"). The armpits are cut down c. 6", and the back is about 3 to 4" lower than the front. Tie yourself into this a few times and look it over repeatedly in the mirror to check the fit. If necessary, cut out a whole new pattern to get a good fit and shape.
| The shoulder flaps must curve outwards a little so that they lie properly. There is some inclination to make the shoulder flaps with fewer layers than the body, but armor as a rule is heaviest at the shoulders. | ![]() |
CUTTING AND GLUING--I
cut out all the shoulder guard layers to their finished shapes, except
for the short slits that define the part that sticks up behind the neck.
Dribbling the glue onto the fabric and then spreading with a narrow spackling
knife is MUCH easier than using a brush, though a brush is better for the
outermost layer where you don't want too much glue. Also, I started
with the inside white layer, but since the white linen is thinner than
the Belgian it would have been easier to glue a couple natural layers together
and then add the white. I glue three layers, then wait an hour or
so and added a few more; then wait for them to dry overnight before continuing.
Make sure the shoulder guard stays flat while drying--in fact it's a good
idea to sandwich it between 2 layers of plywood with lots of weight on
top, and plastic between wood and linen, to keep things from wrinkling
or curling. An hour or two under the weights should do, then let
it dry uncovered overnight.
I finished the edge with white
linen tape, 3/4" wide, glued carefully around the front, then folded around
the edge and glued to the back. Looks great! There is a painting
in Connolly of a white linen cuirass, rather plain, but the top edge and
the shoulder flaps are edged with red, very attractive. The finished
shoulder flaps do seem to bend down properly, and definitely pop straight
up when released.
For forming the body, I have an
oval-shaped old home-made birdcage made of half-inch metal screen.
It's a little larger around than I am and about two feet tall--perfect!
I covered it with a couple layers of heavy brown paper and then plastic,
and taped on a length of nylon netting where the seam in the body would
be. That wraps around to hold the drying linen to the form.
First I glued the 7 inner layers, then covered them with plastic and did
the 8 outer layers. Remember that the inner layers need to be about
an inch taller than the outer so that the inner pteruges project below
the outer ones. Also, the circuference increases with each layer,
so a growing amount of length in that direction is wise, also. You
can trim to the proper length once it's all dry.
Oh, another gluing hint--the shoulder
flaps are small enough that you can just fold each new layer in half and
carefully lay it down onto the glue-covered previous layer. For the
body, however, roll each layer onto a piece of broomstick or similar rod,
spread the glue, then carefully unroll the rolled layer and smooth it as
you go. Having an assistant would be a big help!
I ended up having to add a 9th layer to the outer section, since some glue soaked through the eighth layer and made yellow blotches. It occurred to me that by making this outer layer longer and wider than the rest I could wrap it around the bottom and side edges for a nice finishing touch. I folded it over the bottom edge right away, but waited until the inner and outer sections were glued together to do the ends. Realizing that this was a clever idea, I added a half-height layer to the inner section, just covering the part where the pteruges will be cut.
Realizing as well that I was doomed
to screw up any attempt to paint nice straight stripes around the pteruges,
I simply dyed a length of my linen tape red and glued it on! A second
strip went around the waist, just at the top of the pteruges. A brief
experiment made it clear that the pteruges could not be edged with linen
tape if they were only cut with a knife--there would have to be actual
slots between them, even if very narrow. So I have left them raw-edged,
and will soon find out if there is too much fraying. Edgings, and
space between the pteruges, are very clearly shown in some paintings and
sculptures, others are ambiguous. The deciding factor was having
to order another 20 yards of tape...
![]() |
The linothorax under construction.
At left, standing upright, is the outer section of 9 layers of linen, showing
how the 9th layer is folded under the bottom of the pteruges, and left
hanging loose off the ends. Lying down at right is the inner section
of 7 layers, wrapped around the wire mesh form and secured by nylon netting.
On both sections the pteruges have already been cut, and the next step
will be to glue the sections together.
In the foreground is my cardboard pattern, the front scrawled with notes so that I don't omit any important step! |
As noted above, I cut the inner and outer pteruges all at once, then shifted the sections half a pteruge-width and glued them together. THAT is an interesting procedure, trying to keep the alignment of the pteruges steady while getting plenty of glue between the layers but none on the outside. A sawhorse to drape the thing over and a number of clamps (shimmed and padded!) got the job done. There were still unglued gaps appearing here and there, needing more glue and a clamp. The total thickness of the body is about 5/16", or 7 mm, a tad thicker than Connolly's guestimate. The armholes have been cut out, but may need to be enlarged a little bit. The waste pieces from cutting out the armholes can be used as targets for penetration tests with spear and sword.
MATERIALS--Here is where I got my linen:
M.J. Cahn Co., Inc., 510 West 27th St., New York, NY 10001, 212-563-7292, http://www.wovenfabrics.com/ . Excellent linens, very inexpensive (as low as $3 per yard!), including white and heavy natural Belgian. Also wools. Ten yard minimum, probably not a problem because you'll need 15 yards. Ask for samples of what you are interested in.
Wooded Hamlet Designs, 4044 Coseytown Rd., Greencastle, PA 17225.
717-597-1782. www.woodedhamlet.com.
All sorts of linen and wool tapes and trims, and more. Dutch Linen
Tape, 3/4" wide, $1.50 per yard.
POSTSCRIPT: This thing is a PAIN to make!! It's tedious and time-consuming, and mistakes can be ruinous. It can only be constructed in a clean place that you don't mind smearing glue all over, and I am already completely paranoid about getting dirt or stray marks on it since they can NOT be cleaned off! Now I'm wondering if the originals might have been completely painted over to make a more cleanable surface. My linothorax weighs about 10 pounds, and is quite comfortable. It MUST be stored on a proper armor stand, or it sags and flattens out of shape. But yes, when you show up wearing one of these babies, you get a lot of compliments!
-----------------------
Home*Hoplon*Linothorax*Weapons*Higgins
Helmets*Photos*Bibliography