TUNIC
2/25/03
|
|
|
|
|
|
|
|
|
|
|
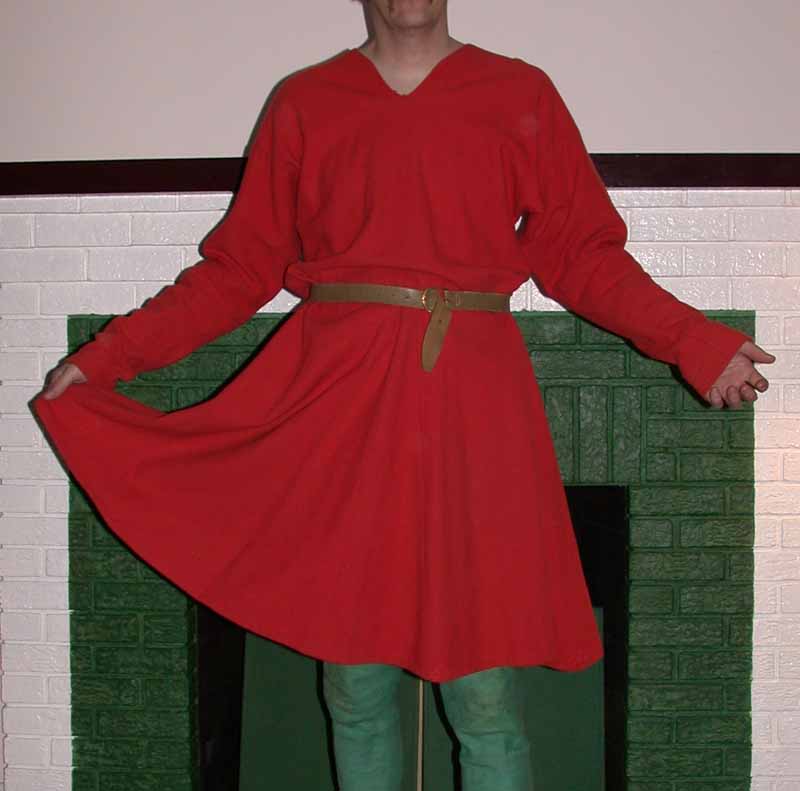
The tunic
is the basic men's garment, and it was common to wear a wool one over a
linen undertunic. Your tunic should reach at least to your knees,
and the skirt is flared with gores. The sleeves should fit fairly closely
along the forearms, and can end anywhere between wrist and fingertips.
|
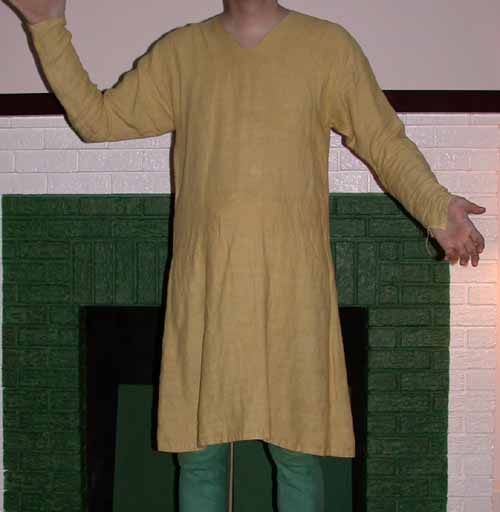
At left, the basic tunic in linen, without slits (21 K). The seam at the left wrist is torn... At right, wool tunic copied from an original found in a bog at Moselund Mose, Denmark (41 K). It is a much more complicated pattern, with pleated and split gores front and back, and side gores that extend all the way up to the shoulder. The sleeves and armholes are shaped. | |

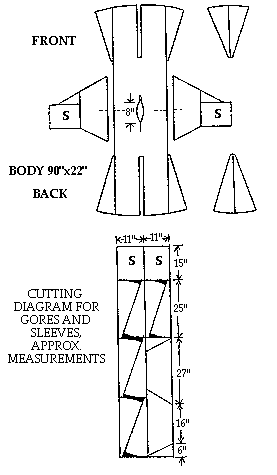
This first
pattern is designed for 2 yards of 45"-wide fabric: 1 1/3 yards for the
body, and 24 inches for the sleeves. Wrist measurement (narrow end
of "S") equals the distance around your closed fist plus an inch for seam
allowance. if your fabric is wider than 45 inches (most wool is), you can
widen the body halves, but leave the sleeves 22 inches wide at the top
unless you really need the space. The leftover fabric can become more gores.
To assemble, sew the body halves together only at the top, and cur the neck-hole out as small as possible--round, semi-circular, or square, with a short slit. Sew the 2 little gore halves (G) together to match the shape of the big gore; sew the gores to either side of the back panel, or in slits at the center front and back. (It is even better to have gores in the center and at the sides.) You will probably need to trim the sleeves to fit closer along the forearm, but not too tight. Sew the sleeves to the body, centered on the shoulder seam. Finally, fold the whole thing in half (into a tunic shape), and sew each side from wrist to armpit to hem.
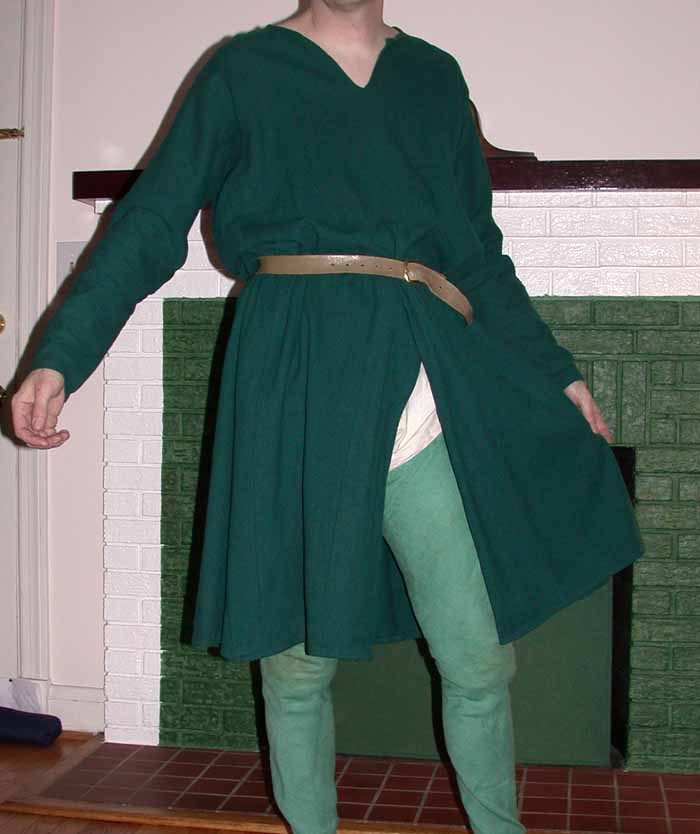
KRAGELUND MOSE TUNIC
 |
This is a medieval tunic found on a body in a Danish bog at Kragelound Mose. It was very ingeniously cut from 22"-wide wool, and therefore can be made from about 2 1/2 yards of 45"-wide fabric (get about 3 yards, at least 48" wide, and wash to pre-shrink). The narrow neckhole is slit front and back on the original. The use of gores to give fullness and the clever design to eliminate fabric waste are typical. Assembly is about the same as for the first tunic, except that you must put each sleeve together before sewing it to the body. When the sleeve is in place and you are ready to sew wrist-to-armpit, stretch the back edge of the sleeve slightly as shown, to make up for the extra length given by the triangular gusset. The sleeves of the finished tunic do not lie flat! When assembling
gores from halves, always sew together the 2 edges that are parallel to
the selvedge edge of the fabric, not the diagonal edges.
Whatever tunic pattern you use, some variations are possible. Square gussets can be inserted under the arms to relieve tightness in the armhole or across the chest. The side gores can be extended up the armpits, or even to the top of the shoulder (behind the sleeve), which will widen the body. The front and back may be split from hem to crotch (in the middle of the gores, if any), but this is a fashion which varies from time to time and place to place. |
How to make an authentic Viking era tunic, by Carolyn
Priest-Dorman
http://gersey.tripod.com/history/tunic.html
Viking Experience Kit Guide on the Kyrtle (Tunic),
http://www.the-viking-expericence.co.uk/authenticity/basickit/basickit4.html
Inserting Gores and Gussets, http://www.vertetsable.com/goresgussets.htm
|
|
|
|
|
|
|
|
|
|
|