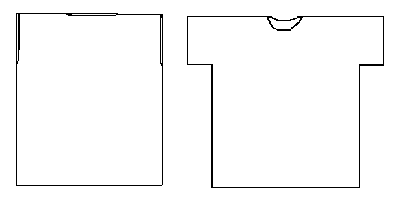
Short sleeves are an option, c. 6" long by 12" high, cut with the body panels, but sleeveless tunics were much more common. The tunic hangs to the knees or below, but is normally worn bloused over a cord or tied belt to raise the hem above the knee.
TUNIC 3/14/11
 |
The
basic
garment is a white or off-white wool tunic made of 2 rectangles
approximtely
36"-48" long by 30"-48" wide, sewn together at the sides and
shoulders.
The body panels are cut across the grain of the fabric, so that there
is
a selvage (finished) edge at the top and bottom. (Actually, since
modern wool is often wider than Roman wool, you will probably have a
selvage
at either top or bottom.) The body should be quite baggy and
loose--it
fits like a tent, not a T-shirt! Original tunics were frequently
wider than they were long, and could be as large as 60" long by 55"
wide.
Short sleeves are an option, c. 6" long by 12" high, cut with the body panels, but sleeveless tunics were much more common. The tunic hangs to the knees or below, but is normally worn bloused over a cord or tied belt to raise the hem above the knee. |
Practically any available white or off-white wool is acceptable--it need not be blanket-weight, but it should certainly be 100% wool. Civilian tunics commonly had a pair of vertical stripes called clavi at front and back (see Civilian Clothing), but it is not known for certain if military tunics had them or not.
Undertunics cannot be well documented, but the wearing of one for comfort is an option. Make it of white or natural linen, the same shape as your wool tunic or a little smaller. In very hot weather a linen tunic may be worn instead of wool to avoid dangerous overheating.
Sewing a tunic is very
simple.
Prewash your fabric! The cut ends of linen will unravel a LOT, so
they must be zig-zagged, hemmed, or whipstitched FIRST!
Also,
allow for at least three inches of shrinkage, length AND width, per
yard
of fabric. Use hot wash/cold rinse/machine dry for linen, cold
wash
gentle/cold rinse/line dry for wool. Iron well. Only now
should
you measure and cut the pieces for your tunic. Here is how the
pieces
of a sleeved tunic can be fit onto the fabric, depending on the
dimensions:

Place the front and back panels
together inside out, sew the sides and top, then turn rightside
out.
Regular cotton thread is acceptable, though it is possible to find
linen
sewing thread for extra authenticity. We generally machine sew
the
seams and do the hems by hand, but doing the whole thing by hand is
certainly
a worthy option. Running stitches (in-and-out) are fine for seams
and hems. For hems on linen especially, it is best to turn the
edge
under twice (very narrow, 1/4" to 3/8") to hide the cut edge
completely,
then stitch. (Iron these folds down before you stitch, to make
hemming
much easier.) The cut edges inside a linen tunic should be
whip-stitched
or machine zig-zagged, either before or after assembly, so that the
finished
garment can be machine washed when dirty (warm or cold water).
Otherwise,
and for wool tunics, simply squish into a bucket of cool, soapy water,
let sit a while, then rinse and line dry. The Romans used urine
(ammonia)
and sulfur smoke to bleach white clothing!
A simple tie belt can be made from a long strip of linen or wool about 4 inches wide. Fold the edges in towards the middle, then fold in half lengthwise and stitch.
For fabric sources, see the Suppliers
page.
The issue of tunic color has been hotly debated, to say the least. The best information is in Graham Sumner's book Roman Military Dress, but he makes no solid conclusions. Essential reading! Our interpretation AT THIS TIME is that legionaries wore white (undyed) tunics and that centurions wore red. However, it is possible that undyed tunics were worn in peacetime or off-duty, while red was worn for going to war or going to battle. We acknowledge that we could be wrong and are eager for new research to add to the debate.
We usually make our own tunics, since they are so simple. For those who wish to purchase, La Wren's Nest makes a good one.
Do NOT buy a tunic from Museum Replicas! It is very inaccurate, as well as being cotton. See the page of Things to Avoid.